Cooking chicken breast can feel like a gamble. Sometimes it’s perfectly juicy and tender, but other times it’s disappointingly dry and tough. Sound familiar? Don’t stress—it’s a common kitchen challenge, but the solution is surprisingly simple. With the right methods, you can cook chicken breast that’s consistently moist, flavorful, and absolutely delicious.
Whether you’re whipping up dinner or prepping meals for the week, this guide will help you master the best way to cook chicken breast without drying it out. Ready to transform your chicken game? Let’s get started!
Ready to say goodbye to dry chicken forever? Let’s dive into the juicy details!
Table of Contents
Why Does Chicken Breast Dry Out?
Before we get into the details, let’s discuss the reasons. Chicken breast is very low in fat, which makes it less moist during cooking. If you cook it at high temperatures or for too long, it can easily dry out. However, there are simple methods to prevent this from happening.
- Start with Quality Chicken
Cooking a delicious chicken breast starts long before you turn on the stove. The quality of the chicken you choose plays a huge role in how juicy and flavorful the end result will be. It might seem like a small detail, but trust me, it makes a difference.

Why Quality Chicken Breast Matters
When dealing with chicken breast—one of the leanest cuts of meat—you’re already working with less fat to keep things moist. Choosing high-quality chicken ensures you’re starting with breast that has better texture and flavor. It’s like building a house on a solid foundation—if the base is good, the results will be perfect.
What to Look For When Buying Chicken Breast
Here’s what to keep in mind when you’re at the grocery store or butcher shop:
- Fresh Over Frozen
While frozen chicken can be convenient, fresh chicken often has a better texture and flavor. If you go for frozen, check that it’s vacuum-sealed to prevent freezer burn.
- Organic or Free-Range
Organic and free-range chicken are raised without added hormones or antibiotics, which can impact both flavor and quality. These birds often have a firmer texture and a more natural taste.
- Check the Color
When the chicken breasts are pink and moist. Avoid any that are grayish or have a slimy film—these are signs the chicken isn’t fresh.
- Inspect the Packaging
If you’re buying pre-packaged chicken, check for excess liquid in the bottom of the tray. Too much liquid can mean the chicken has been sitting for a while or injected with saline solution.
Where to Shop for Quality Chicken
For the best chicken, consider these options:
- Local Butcher Shops: They offer fresh, locally sourced chicken with better flavor. You can also ask about how it was raised.
- Farmers’ Markets: Great for organic or free-range chicken, often fresher than grocery store options. Vendors are usually happy to share details about their farming practices.
- Specialty Grocery Stores: Look for labels like USDA Organic or free-range for premium-quality chicken.
- Online Retailers: Convenient and reliable, with detailed sourcing information and home delivery.
Choosing local or specialty sources ensures fresher, better-tasting chicken while supporting ethical farming practices.
Choosing the Right Size
When selecting chicken breasts, it’s important to choose pieces that are roughly the same size. This is because uniform sizes cook at the same rate, ensuring the entire breast is perfectly done. If the chicken pieces vary in size, larger parts may take longer to cook, which can result in overcooked, dry edges and undercooked, unsafe centers. Choosing similar-sized breasts simplifies the cooking process and helps achieve tender, juicy results.
Bonus Tip: Avoid Pre-Marinated Chicken Breast
Pre-marinated chicken can be tempting because it saves time and effort, but it often comes with downsides. These products are usually packed with high levels of sodium and artificial additives designed to enhance flavor and prolong shelf life. While this may make the chicken taste seasoned, it limits your control over the flavors and may not be as healthy as freshly prepared alternatives.
By choosing plain, unseasoned chicken breasts, you get the flexibility to customize the flavors to suit your taste and dietary preferences. You can use fresh herbs, spices, or homemade marinades for a healthier, more natural approach to seasoning. Plus, seasoning the chicken yourself allows you to experiment with different flavor profiles, making your meals more enjoyable and tailored to your liking. (Stay tuned for tips on seasoning later!
Starting Strong
When you invest in quality chicken, you’re setting yourself up for success. You’ll notice a difference in taste, texture, and ease of cooking. In the next sections, we’ll explore simple techniques—such as brining and various cooking methods—to ensure your chicken remains juicy and delicious every time.
- Brine Your Chicken for Extra Juiciness
Here’s a game-changer: brining. Soaking chicken breast in a saltwater solution before cooking helps it retain moisture. Plus, it’s super simple to do.
How to Brine Chicken Breast :
- Mix 1/4 cup of salt with 4 cups of water in a large bowl. (You can add sugar or spices for extra flavor.)
- Submerge the chicken breasts completely.
- Let them sit for 15–30 minutes, or up to 4 hours in the fridge for maximum juiciness.
- Rinse the chicken and pat it dry before cooking.
- Pound the Chicken to an Even Thickness
Uneven chicken breasts are a recipe for disaster. Achieving good performance in cooking often comes down to a few key techniques. For instance, when cooking chicken, it’s essential to ensure even thickness. The thinner end cooks faster, which can lead to uneven results—one side might be perfectly cooked while the other is undercooked or overcooked. To avoid this, gently pound the chicken using a meat mallet or rolling pin to create an even thickness. This small step can significantly enhance your cooking results, making for a beautifully cooked piece of chicken. Trust me, it makes a huge difference!
- Season Generously
Now comes the fun part—flavor! Seasoning isn’t just about taste; it also helps lock in moisture. Don’t be shy with your spices. Here are a few ideas:
- Classic combo: Salt, pepper, garlic powder, and paprika.
- Zesty kick: Lemon zest, thyme, and chili flakes.
- Smoky vibes: Smoked paprika, cumin, and a touch of brown sugar.
Pro tip: If you’re using a marinade, let the chicken soak for at least 30 minutes. Overnight is even better!
- Choose the Right Cooking Method
Not all cooking methods are created equal when it comes to chicken breast. Some are better for keeping it juicy. Let’s break down the options:
Stovetop
Cooking chicken breast on the stovetop is quick and easy. Here’s how:
- Heat a skillet over medium-high heat and add a bit of oil.
- Sear the chicken for 2–3 minutes per side until golden brown.
- Lower the heat, cover the skillet, and cook for another 6–8 minutes. (Use a meat thermometer to check—165°F is your magic number.)
Oven-Baked Chicken Breast
Baking is hands-off and perfect for meal prep. Follow these steps:
- Preheat your oven to 375°F.
- Place the chicken breasts on a baking sheet lined with parchment paper.
- Brush with olive oil and season.
- Bake for 20–25 minutes, checking the internal temperature.
Poaching
For the ultimate in moist chicken, poaching is your best bet:
- Place the chicken in a pot and cover it with water or chicken broth.
- Add aromatics like garlic, bay leaves, or peppercorns.
- Simmer (don’t boil!) for 15–20 minutes, then check the temp.
Grilling
Grilling adds a smoky flavor, but it’s easy to overdo it. Keep an eye on the chicken breast and flip it halfway through cooking.
- Rest, Rest, Rest!
You’ve cooked your chicken to perfection—now what? Let it rest. Cutting into the meat right away lets all those delicious juices run out. Instead, let the chicken sit for 5–10 minutes before slicing. This step is non-negotiable if you want juicy chicken!
- Slice It Right
Believe it or not, how you slice chicken matters. Always cut against the grain (those little muscle fibers). This makes the chicken more tender and easier to chew.
Bonus Tips for Extra Flavor
Here are a few quick tricks to take your chicken to the next level:
- Butter Baste: Add a pat of butter to the pan during the last few minutes of cooking. Use a spoon to baste the chicken with the melted butter for extra richness.
- Citrus Finish: A squeeze of lemon or lime right before serving brightens the flavor.
- Pan Sauce: Use the drippings in your pan to make a quick sauce. Just add a splash of broth, a knob of butter, and a touch of cream.
FAQ About Chicken Breast
1. Can I freeze cooked chicken breast?
Absolutely! Let it cool completely, then store it in an airtight container or freezer bag. It’ll keep for up to three months.
2. How do I reheat chicken without drying it out?
Reheat it in a covered dish in the oven or microwave with some chicken broth.
3. What if I don’t have a meat thermometer?
No worries! Cut into the thickest part of the chicken—it should be white, with no pink juices.
4. Can I use these techniques for other chicken cuts?
Yes! While chicken breasts require more attention due to their leanness, these tips can enhance the flavor and juiciness of thighs, wings, or drumsticks too.
5. Can I use pre-marinated chicken breasts?
Pre-marinated chicken can save time, but it often contains high sodium and artificial flavors. Opt for plain chicken and season it yourself for healthier and tastier results.
Why This Method Works
When you combine bringing, even cooking, and resting, you’re setting yourself up for success. It’s all about keeping the natural juices locked inside and avoiding overcooking.
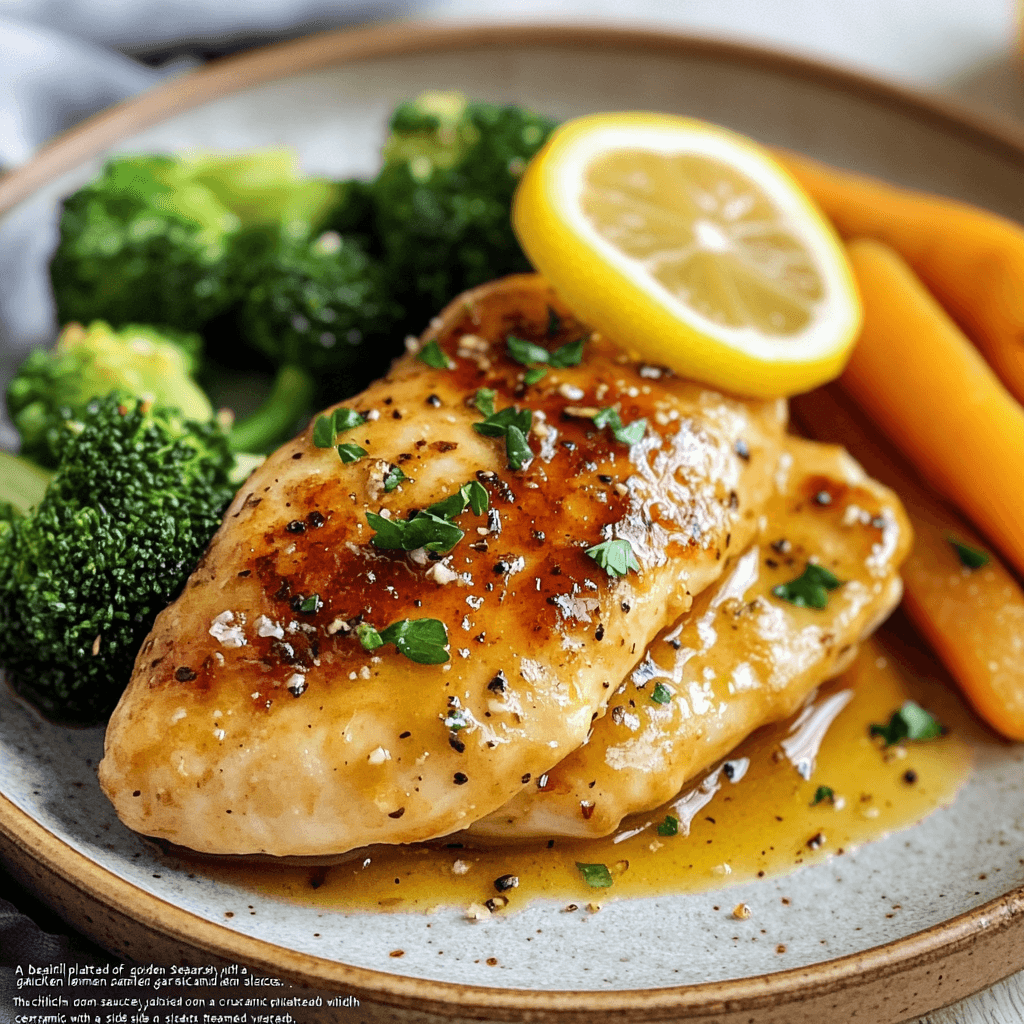
Quick Lemon Garlic Chicken Breast
A zesty and savory dish that’s perfect for busy weeknights, combining simple ingredients for maximum flavor.
Ingredients
- Chicken breast: Approximately 2 lbs, boneless and skinless
- Salt and pepper: To taste
- Flour: 3 tablespoons
- Butter: 2 tablespoons
- Lemon juice: 1 tablespoon (freshly squeezed for best flavor)
- Soy sauce: 2 tablespoons
- Honey: 1 teaspoon
- Garlic: 2 cloves, minced
Instructions
- Prepare the Chicken
Season the chicken breasts on both sides with salt and pepper, then lightly coat them in flour for a golden, crisp exterior. - Sear the Chicken
Heat butter in a skillet over high heat. Add the chicken breasts and cook for 3-4 minutes on each side, or until golden brown. - Make the Sauce
Lower the heat and add lemon juice, soy sauce, honey, and minced garlic to the skillet. Stir to combine and allow the sauce to simmer gently. - Cook to Perfection
Continue cooking the chicken in the sauce for 5-7 minutes, spooning the sauce over the chicken occasionally, until it thickens and coats the chicken evenly. - Serve and Enjoy
Transfer the chicken to a serving plate and drizzle with the remaining sauce. Garnish with fresh parsley or lemon slices for an added touch of freshness, if desired.
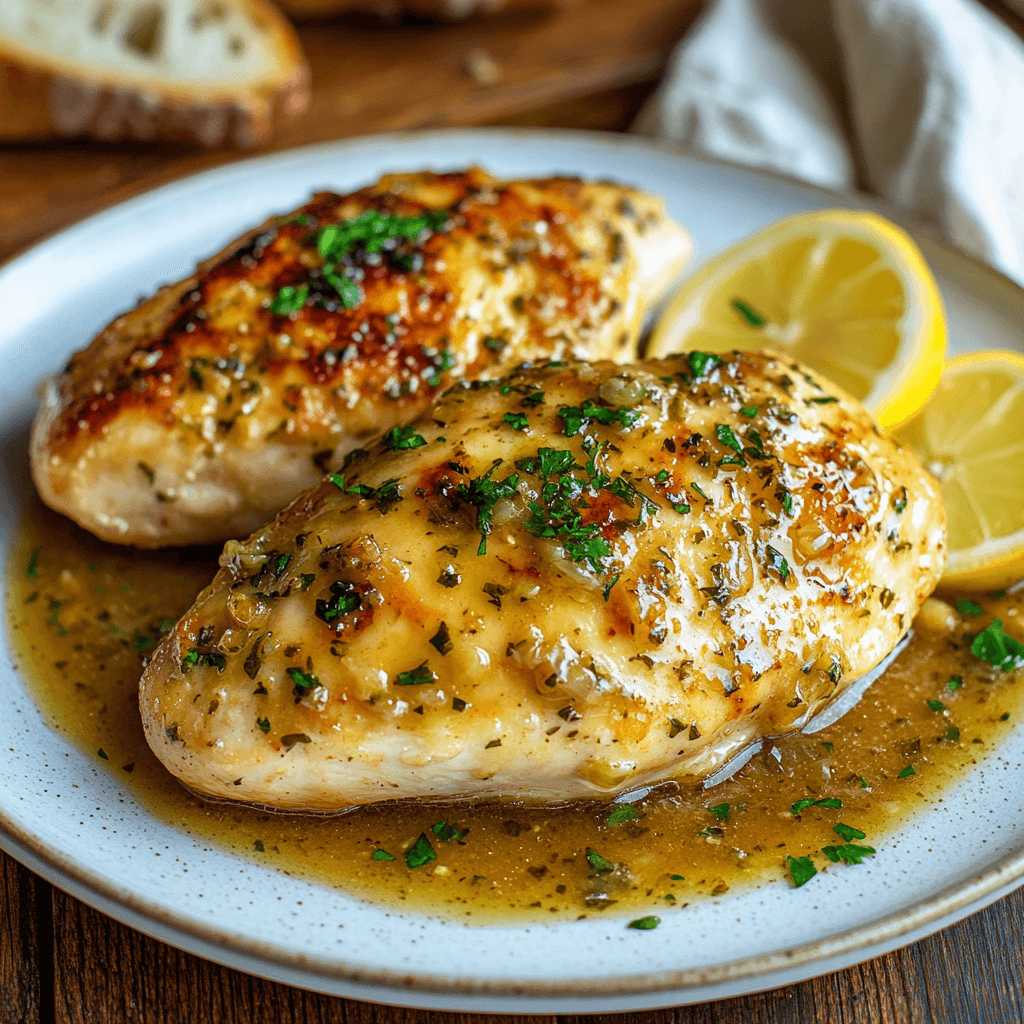
This recipe is versatile, quick to make, and perfect for weeknights when you want something flavorful without the fuss.
Conclusion
And there you have it—a reliable and easy-to-follow guide for cooking chicken breast without worrying about it turning dry or tough. Every step, from brining to letting the chicken rest after cooking, plays a crucial role in ensuring the meat stays juicy, tender, and packed with flavor. Whether you’re preparing chicken breast as a topping for fresh salads, layering it in sandwiches, or serving it as the centerpiece of your meal, these techniques will elevate your cooking. With these tips in your kitchen arsenal, you’ll be able to cook chicken breast like a seasoned pro, impressing family and friends every time!
Explore More Chicken Recipes
If you’re looking to expand your repertoire, browse our recipes for Turkey Lunch Meat Recipes or indulge in the classic comfort of Cheesy Chicken Pasta Bake.
With these tips and techniques, you can enjoy perfectly cooked chicken breast every time. Pair it with complementary recipes for a complete meal experience.
Sous vide is a foolproof way to achieve perfectly cooked chicken every time. Cook the chicken in a vacuum-sealed bag at a controlled temperature before searing it in a hot pan.
For an ideal side dish, consider the flavor-packed Chicken and Green Beans.