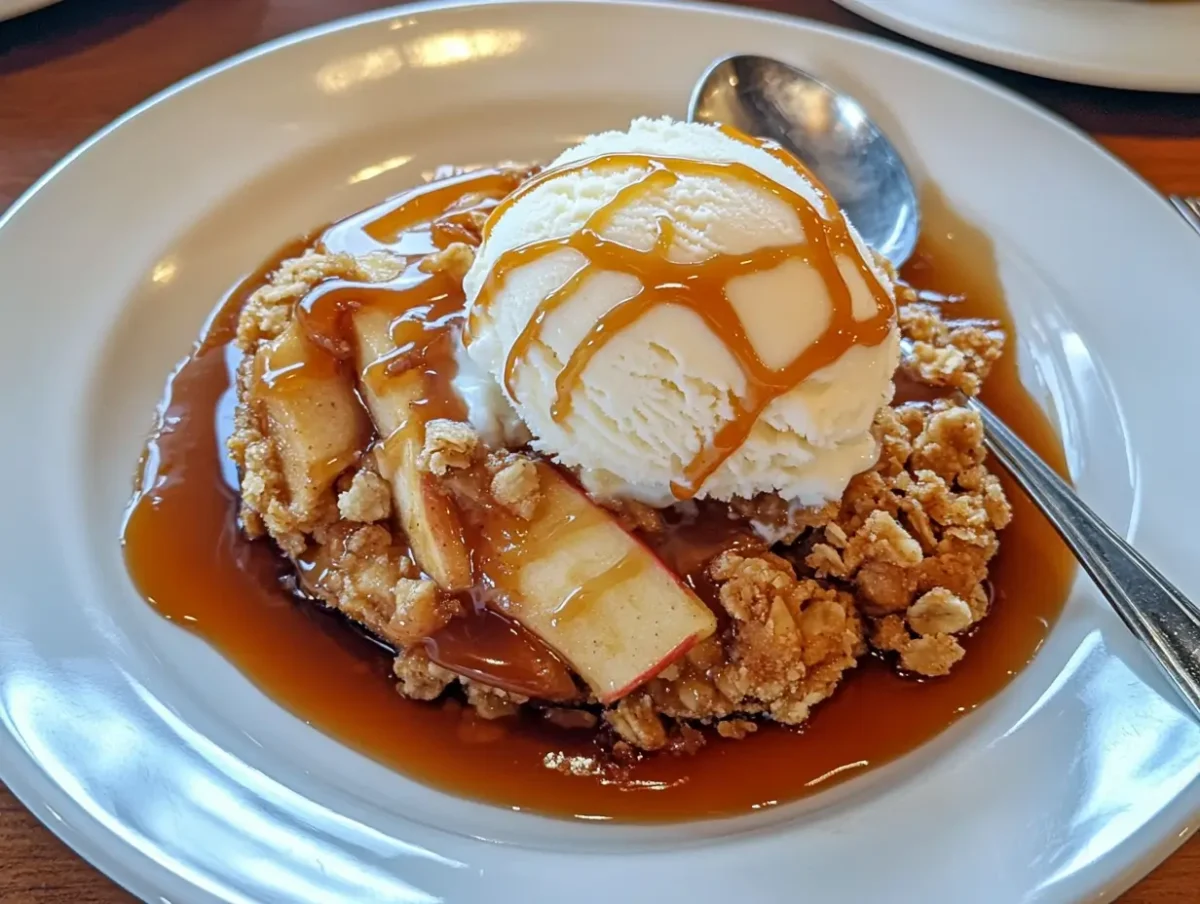
There’s nothing better than a warm, homemade Instant Pot Apple Crisp, and using an Instant Pot makes it even easier! This quick and delicious recipe delivers soft, cinnamon-spiced apples topped with a buttery, crunchy crisp. In this guide, we’ll walk you through how to make the perfect Instant Pot Apple Crisp, the best apples to use, and expert tips to get the best texture and flavor.
Let’s dive in!
Table of Contents
What is Instant Pot Apple Crisp?
Instant Pot Apple Crisp is a classic dessert featuring warm, spiced apples topped with a crispy, buttery oat topping. But when made in an Instant Pot, this comforting treat becomes even simpler and quicker to prepare—no need to turn on the oven!
With pressure cooking, the apples break down into a perfectly soft texture while retaining their natural sweetness. The topping is then crisped up using an optional broiler step or an air fryer lid.
Let’s break down the key differences between apple crisp and apple pie and explore why an Instant Pot is a fantastic tool for making this dessert.
What Makes Instant Pot Apple Crisp Different from a Pie?
Although both apple crisp and apple pie feature warm, spiced apples, they have a few major differences:
| Feature | Apple Crisp | Apple Pie |
|---|---|---|
| Crust | Oat-based, crumbly topping | Flaky, buttery pie crust |
| Texture | Crunchy on top, soft apples underneath | Evenly baked, structured layers |
| Baking Method | Usually baked or cooked in an Instant Pot | Always baked in an oven |
| Prep Time | Quick and easy, no rolling dough | Requires making and chilling dough |
Apple crisp is often considered the easier and faster alternative to pie, making it a perfect dessert for beginners or those short on time.
Why Use an Instant Pot for Apple Crisp?
The Instant Pot has revolutionized home cooking by making recipes faster and more convenient. Here’s why it’s a game-changer for apple crisp:
✅ Faster Cooking Time: The Instant Pot significantly reduces cooking time compared to oven baking.
✅ No Need for an Oven: Perfect for summer or small kitchens without heating up the house.
✅ Even Cooking: The pressure cooking method ensures the apples soften evenly.
✅ Consistently Delicious: No risk of overbaking or burning, thanks to controlled pressure cooking.
Using an Instant Pot also lets you infuse the apples with flavor while maintaining their texture. Plus, it’s a one-pot recipe, which means less cleanup!
Ingredients for the Perfect Apple Crisp
To make the best Instant Pot Apple Crisp, you need the right balance of apples, spices, and a crunchy topping. Choosing high-quality ingredients ensures a perfectly spiced, tender, and crispy dessert every time.
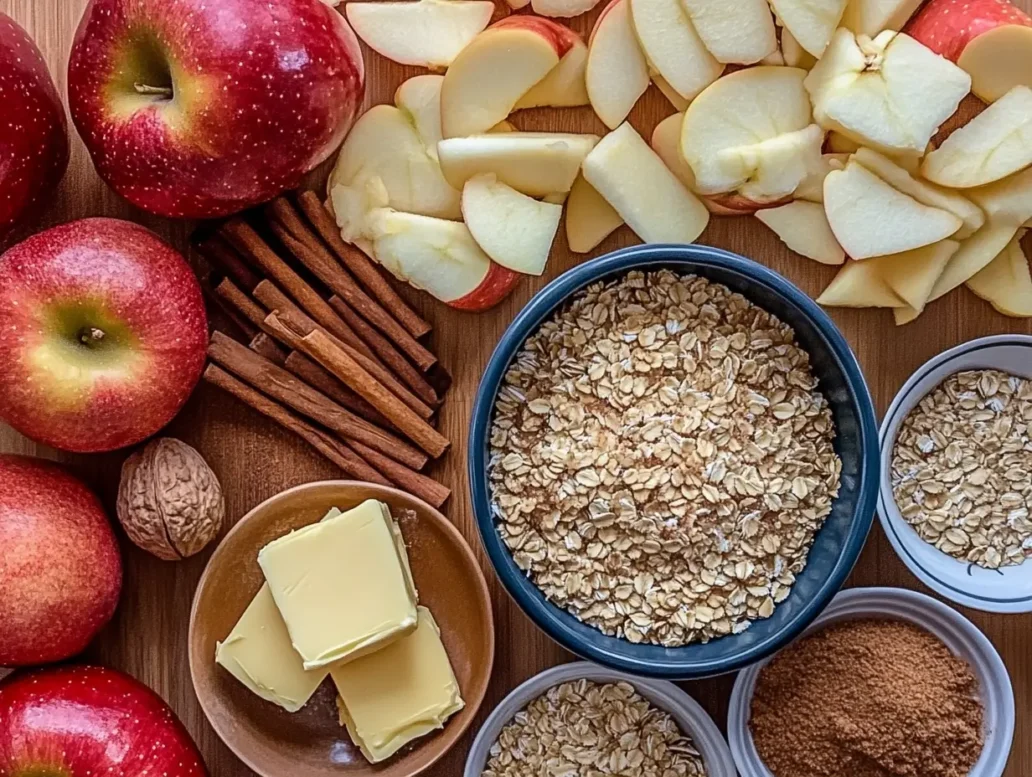
Let’s go over the best apples to use and other key ingredients for a flavor-packed apple crisp.
Best Apples for Apple Crisp
Not all apples are created equal! The key to a great apple crisp is choosing firm, slightly tart apples that hold their shape when cooked.
Here are the best apples for Instant Pot Apple Crisp:
| Apple Variety | Flavor Profile | Texture When Cooked |
|---|---|---|
| Granny Smith | Tart and slightly sweet | Holds firm, ideal for crisp |
| Honeycrisp | Sweet with a slight tartness | Stays crisp and juicy |
| Fuji | Very sweet with a dense texture | Softens but holds its shape |
| Jonagold | Sweet with a bit of tartness | Becomes tender and flavorful |
| Braeburn | Spicy-sweet with firm flesh | Doesn’t turn mushy |
| Pink Lady | Balanced sweet-tart flavor | Keeps its texture well |
For the best flavor and texture, try mixing two or more apple varieties—such as Granny Smith + Honeycrisp—to balance sweetness and tartness.
Other Essential Ingredients
Besides apples, you’ll need a handful of simple pantry staples to create the perfect crisp.
For the Apple Filling:
- Apples (5-6 medium apples) – Choose from the list above for the best results.
- Brown Sugar (¼ cup) – Adds a deep caramel-like sweetness.
- Cinnamon (1 teaspoon) – The key spice for that classic apple crisp flavor.
- Nutmeg (½ teaspoon, optional) – Adds warmth and depth.
- Lemon Juice (1 tablespoon) – Prevents apples from browning and enhances flavor.
- Vanilla Extract (1 teaspoon) – Boosts the natural sweetness of the apples.
- Cornstarch (1 tablespoon) – Thickens the filling and prevents it from getting too watery.
For the Crisp Topping:
- Old-Fashioned Oats (½ cup) – Gives the topping its signature crunch. Avoid quick oats!
- All-Purpose Flour (¼ cup) – Helps bind the crisp topping together.
- Brown Sugar (¼ cup) – Sweetens the topping and adds a rich molasses flavor.
- Cinnamon (½ teaspoon) – Complements the warm apple filling.
- Salt (¼ teaspoon) – Enhances all the flavors.
- Unsalted Butter (¼ cup, melted) – Creates a buttery, golden-brown topping.
💡 Pro Tip: Want a richer flavor? Swap brown sugar for maple syrup or add a handful of chopped pecans or walnuts to the crisp topping for extra crunch!
Step-by-Step Guide to Making Instant Pot Apple Crisp
Making apple crisp in an Instant Pot is quick and easy. With just a few simple steps, you’ll have a warm, comforting dessert ready in no time.
Here’s a step-by-step guide to ensure your apple crisp turns out perfectly spiced, tender, and crispy every time.
Step 1: Preparing the Apples
- Wash and peel the apples – If you prefer a softer texture, peel them. Otherwise, leave the skin on for extra fiber.
- Core and slice the apples – Cut them into ¼-inch thick slices or small chunks for even cooking.
- Toss apples with seasonings – In a mixing bowl, combine:
- Apples (5-6 medium apples, sliced)
- Brown sugar (¼ cup)
- Cinnamon (1 teaspoon)
- Nutmeg (½ teaspoon, optional)
- Lemon juice (1 tablespoon)
- Vanilla extract (1 teaspoon)
- Cornstarch (1 tablespoon) (to thicken the sauce)
💡 Pro Tip: Mixing apples with spices before cooking helps the flavors infuse deeply, making the crisp extra delicious!
Step 2: Making the Crisp Topping
In a separate bowl, mix the following ingredients for the crunchy oat topping:
✅ ½ cup old-fashioned oats – Adds crunch and texture.
✅ ¼ cup all-purpose flour – Helps hold the topping together.
✅ ¼ cup brown sugar – Provides sweetness and caramel-like richness.
✅ ½ teaspoon cinnamon – Enhances warmth and flavor.
✅ ¼ teaspoon salt – Balances sweetness.
✅ ¼ cup melted butter – Binds everything together for a crispy texture.
Stir well until the topping mixture resembles coarse crumbs.
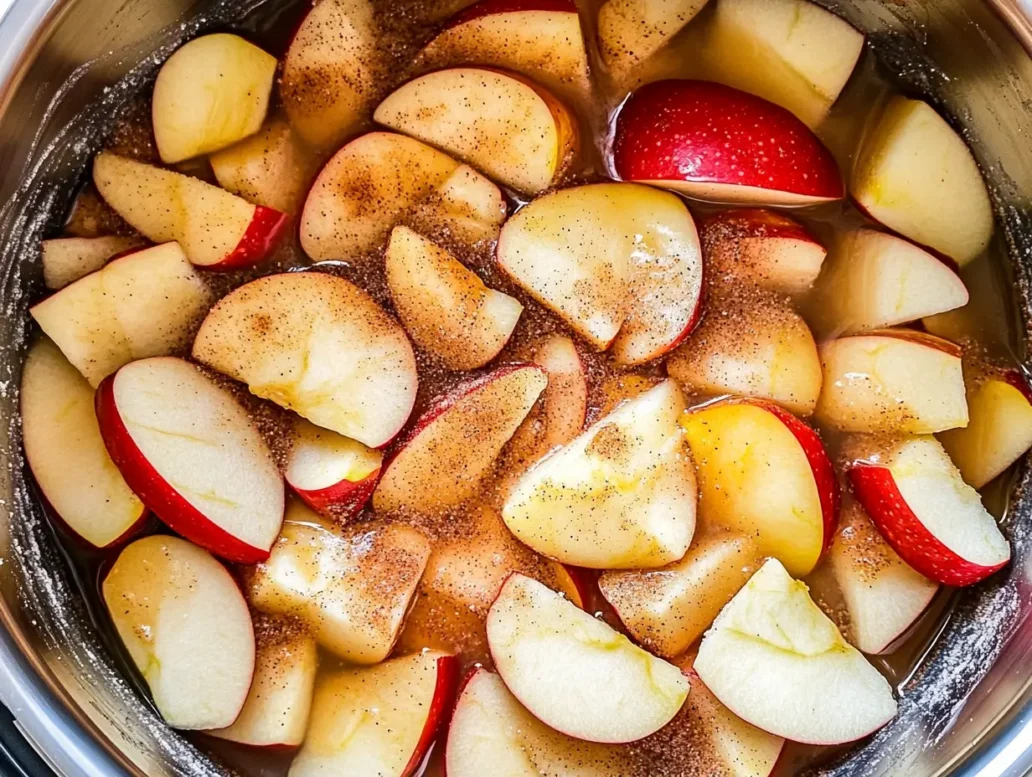
Step 3: Cooking in the Instant Pot
- Add ½ cup water to the Instant Pot – This prevents burning and helps create steam.
- Pour the apple mixture into the pot – Spread it out evenly.
- Place a trivet inside the Instant Pot – This keeps the topping from getting soggy.
- Add the crisp topping – Spoon the oat mixture over the apples.
- Cover with foil (optional) – Helps prevent the topping from absorbing too much moisture.
- Close the lid and set to “Sealing” – This ensures proper pressure cooking.
Step 4: Pressure Cook & Release
- Set the Instant Pot to “Manual” (or “Pressure Cook”) on HIGH for 1 minute.
- Let the pressure release naturally for 5 minutes, then do a quick release.
- Carefully open the lid and check the apples – They should be tender but not mushy.
Step 5: Crisping the Topping (Optional but Recommended!)
Since the Instant Pot doesn’t brown the topping, you can crisp it up using one of these methods:
Using an Air Fryer Lid (Easiest Option!):
- Replace the Instant Pot lid with an air fryer lid.
- Set it to 400°F and air fry for 3-5 minutes until golden brown.
Using the Oven Broiler:
- Transfer the apple crisp to an oven-safe dish.
- Broil on HIGH for 2-3 minutes, watching closely so it doesn’t burn.
Step 6: Serve & Enjoy!
Let the apple crisp sit for 5-10 minutes before serving—this allows the flavors to meld.
Top with vanilla ice cream, whipped cream, or caramel sauce for extra indulgence!
💡 Storage Tip: Leftovers can be stored in an airtight container in the fridge for up to 4 days.
Tips for the Best Apple Crisp Texture & Flavor
A great Instant Pot Apple Crisp should have soft, perfectly spiced apples with a crunchy, golden topping. However, achieving the right balance can be tricky if the apples turn mushy or the topping becomes soggy.
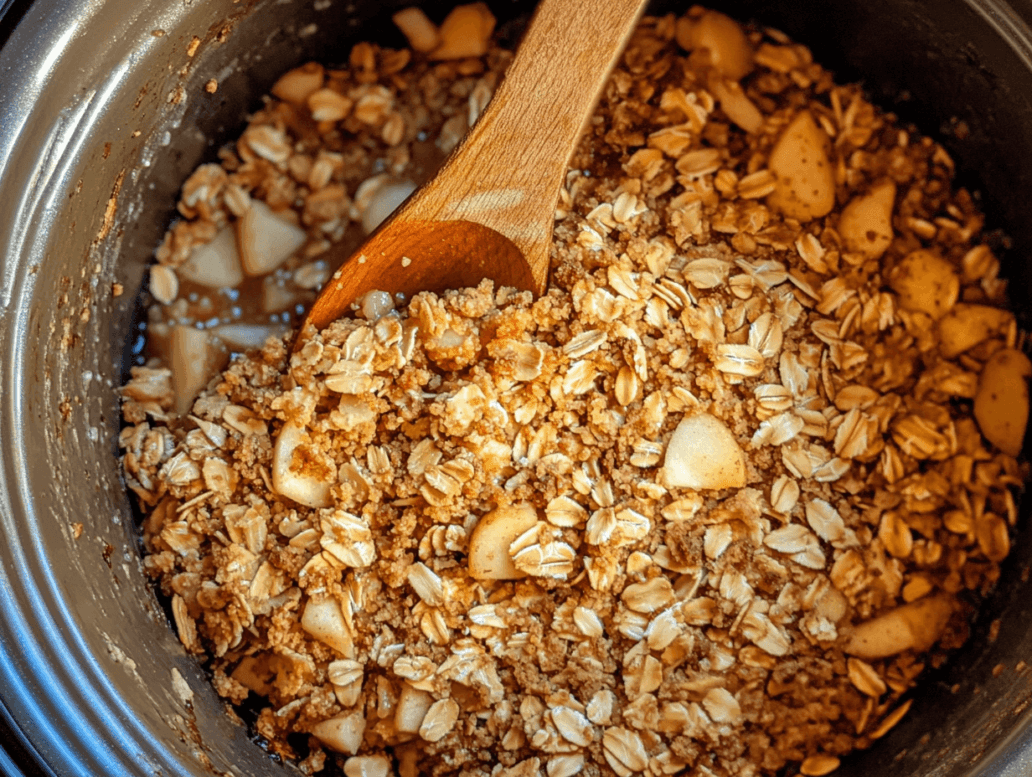
Follow these expert tips to ensure the best texture and flavor every time.
How to Avoid a Soggy Crisp
One common mistake when making apple crisp in an Instant Pot is ending up with a soggy topping. Since pressure cooking creates steam, moisture can make the oat topping too soft.
Here’s how to keep your crisp topping crunchy:
- Use a trivet or sling: Placing the topping on a small heatproof dish or trivet above the apples prevents it from soaking up too much moisture.
- Cover with foil: Loosely covering the crisp topping with foil can help reduce steam exposure.
- Use an air fryer lid or broil after cooking: Crisping the topping in an air fryer or oven broiler after pressure cooking adds the perfect crunch.
- Do not overcook: Apples release liquid as they cook. Cooking them too long can create excess moisture, softening the topping.
Adding Extra Flavor
A well-balanced apple crisp should have a rich depth of flavor, combining warm spices, sweet apples, and a buttery topping. Here are some ways to elevate the taste:
- Use a mix of apples: Combining tart apples like Granny Smith with sweet varieties like Honeycrisp creates a balanced flavor.
- Add warm spices: Cinnamon is essential, but adding nutmeg, allspice, or ginger can enhance the spice profile.
- Try maple syrup or honey: Replacing brown sugar with maple syrup or honey in the filling adds a deeper sweetness.
- Incorporate nuts: Chopped pecans or walnuts in the crisp topping add crunch and a nutty richness.
- Include citrus zest: A touch of orange or lemon zest brightens the overall flavor.
- Drizzle caramel sauce: Adding caramel over the crisp before serving enhances the sweetness and creates a rich, dessert-like finish.
By following these tips, your Instant Pot Apple Crisp will have the perfect balance of tender apples, warm spices, and a crispy, golden topping.
Serving & Storing Apple Crisp
Once your Instant Pot Apple Crisp is ready, it’s time to enjoy it at its best. Whether you’re serving it fresh or storing leftovers for later, these tips will help maintain its flavor, texture, and freshness.

Best Ways to Serve Apple Crisp
Apple crisp is best enjoyed warm, allowing the flavors to shine and the topping to stay crisp. Here are some delicious ways to serve it:
- Classic Style: Serve warm on its own to highlight the rich apple and cinnamon flavors.
- With Ice Cream: Add a scoop of vanilla, caramel, or cinnamon ice cream for a creamy contrast.
- With Whipped Cream: A light and fluffy dollop of whipped cream adds a touch of sweetness.
- With Caramel Sauce: Drizzle warm caramel sauce on top for extra indulgence.
- With Greek Yogurt: For a healthier option, pair it with vanilla or cinnamon Greek yogurt.
💡 Pro Tip: Let the apple crisp cool for 5-10 minutes before serving to allow the flavors to settle and the topping to firm up.
Storage & Reheating Tips
If you have leftovers, proper storage will help maintain the flavor and texture for future servings Instant Pot Apple Crisp
How to Store Apple Crisp
| Storage Method | How to Store | How Long It Lasts |
|---|---|---|
| Refrigerator | Store in an airtight container. Keep topping separate if possible. | Up to 4 days |
| Freezer | Freeze in a freezer-safe container. Let cool completely before freezing. | Up to 3 months |
💡 Pro Tip: If possible, store the crisp topping separately from the apples to prevent it from getting soggy.
How to Reheat Apple Crisp
To keep the crisp topping crunchy, use one of these reheating methods:
- Oven (Best for Crispiness): Preheat oven to 350°F. Place apple crisp in an oven-safe dish and bake for 10-15 minutes until warmed through.
- Air Fryer: Set to 350°F and heat for 5-7 minutes to restore crispness.
- Microwave (Fastest Method): Heat in 30-second intervals until warm. The topping may become softer.
FAQs – Answering Your Top Questions
Here are answers to some of the most frequently asked questions about making Instant Pot Apple Crisp.
1. What type of apples are best for making Apple Crisp?
The best apples for apple crisp are those that hold their shape and provide a balance of sweetness and tartness. Some of the best choices include:
Granny Smith (Tart, firm, holds shape well)
Honeycrisp (Sweet-tart, stays crisp)
Fuji (Very sweet, firm texture)
Pink Lady (Balanced sweet-tart flavor)
For the best results, try mixing two varieties to enhance the flavor complexity.
2. Does Apple Crisp taste as good made in the Instant Pot?
Yes! The Instant Pot allows the apples to become perfectly tender while absorbing all the flavors of cinnamon, nutmeg, and brown sugar. The only difference is that the oat topping won’t naturally crisp up, but you can fix this by using an air fryer lid or broiling it in the oven for a few minutes after cooking.
3. How do you make Apple Crisp in the Instant Pot?
The process is simple and takes just a few steps:
Prepare the apples – Peel, core, and slice them. Toss with cinnamon, sugar, and lemon juice.
Make the crisp topping – Mix oats, flour, brown sugar, cinnamon, and melted butter.
Layer in the Instant Pot – Add apples first, then place a trivet and an oven-safe dish with the topping.
Pressure cook on high for 1 minute, then natural release for 5 minutes.
Crisp the topping – Use an air fryer lid or oven broiler for a golden-brown finish.
This method ensures a flavorful, soft apple
Conclusion & Final Thoughts
Making Instant Pot Apple Crisp is one of the easiest ways to enjoy a warm, comforting dessert with minimal effort. By using the pressure cooking method, you get perfectly tender apples infused with cinnamon and spices, while the crisp topping stays crunchy with the help of an air fryer lid or broiler.
This recipe is:
✔ Quick & Easy – Ready in a fraction of the time compared to baking.
✔ Customizable – Easily adaptable for gluten-free, dairy-free, or nut-free diets.
✔ Perfectly Balanced – Combines the natural sweetness of apples with a crunchy oat topping.
For more recipes you can check our recipes Here
Why You Should Try Instant Pot Apple Crisp
If you’re looking for a delicious, fuss-free dessert that doesn’t require baking, this Instant Pot Apple Crisp is a must-try. Whether you serve it on its own or top it with ice cream, caramel sauce, or whipped cream, it’s sure to become a favorite in your home.
